Using Sitecore Search REST api in NextJS
Our sites are often compositions of data from multiple sources. A common scenario is that product data are actually managed in a PIM system, maybe enriched in CMS. Back in the days we often imported products into Sitecore CMS, but with our composable architecture we want to limit that. One way could be that the product component requests the underlying system(s), but we want to link and show teasers etc. in other parts of the site. Sitecore Search can actually also help with that. The product pages can be indexed with the final result (or even pushed to Sitecore Search).
There is a nice REST api for Sitecore Search1, when using the Sitecore Search SDK React components the REST api is called client side by the components, and hereby it is simple to see the actual requests to the api.
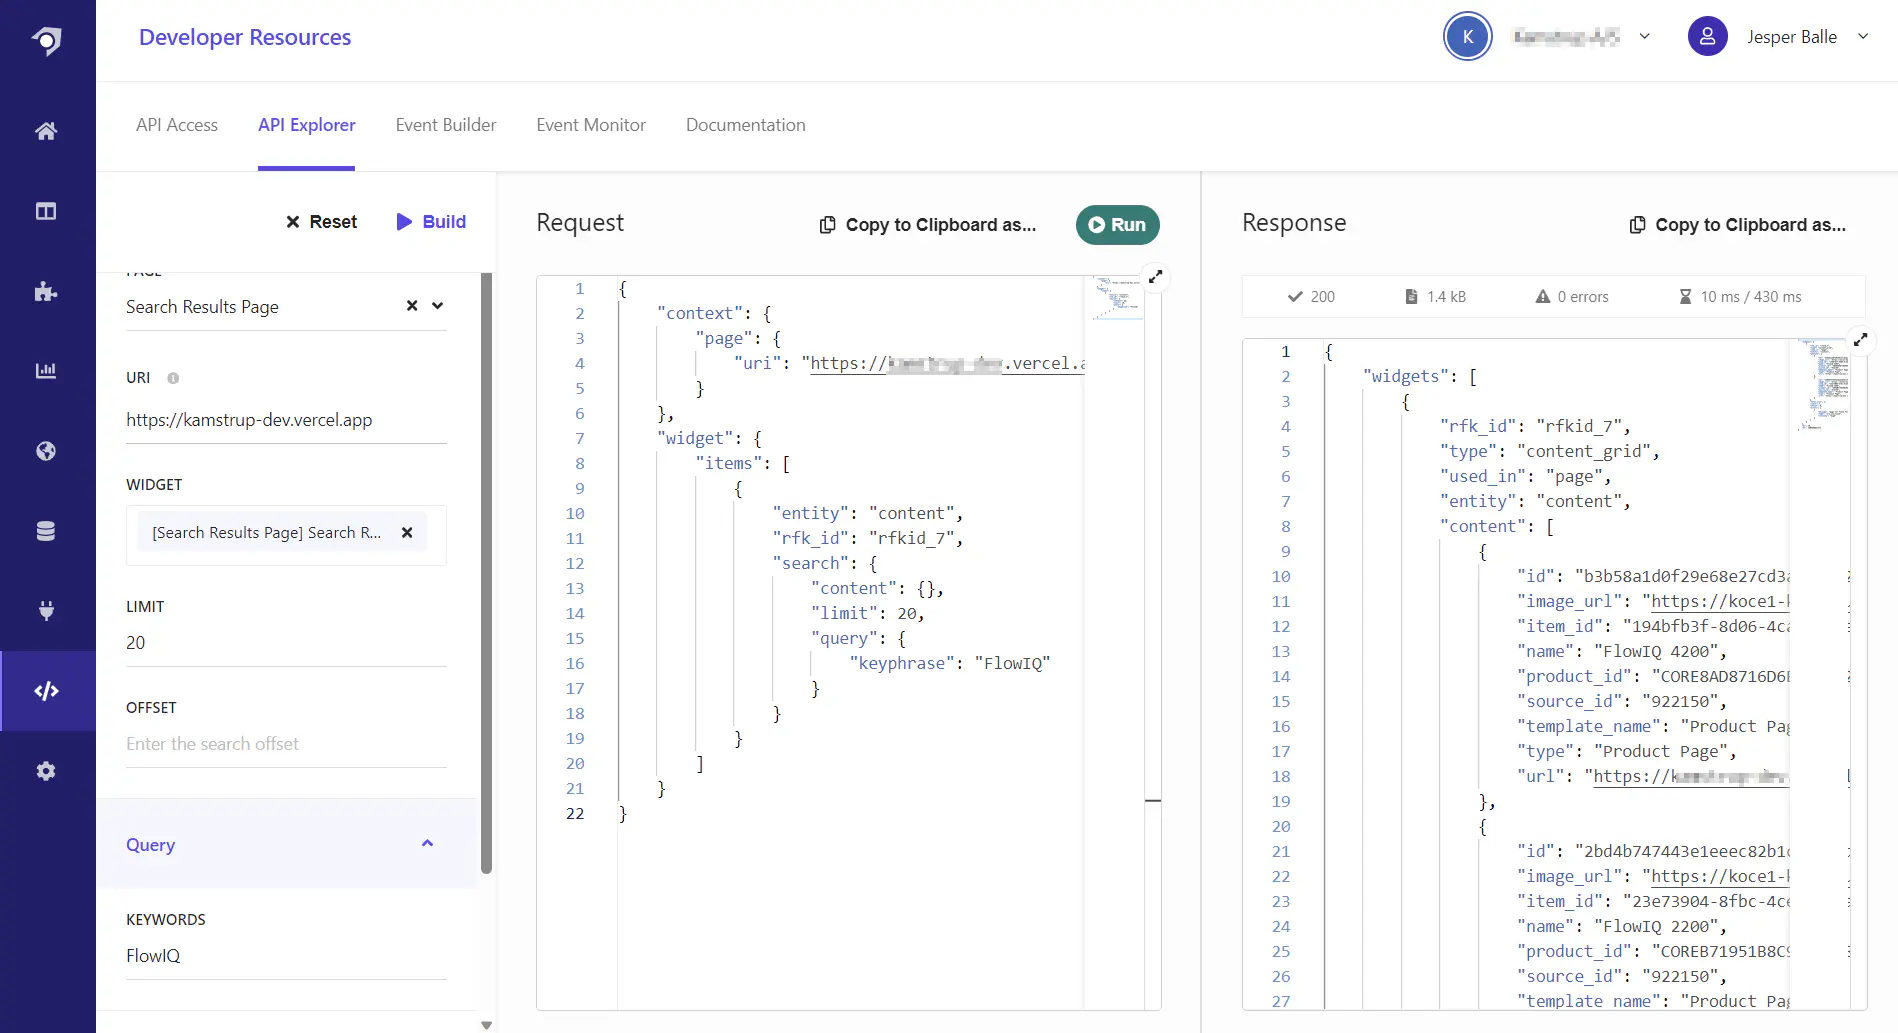
In Sitecore Customer Engagement Console where you manage Sitecore Search, there is in Developer Tools also a nice API Explorer that allows you to build search requests skeletons, write actual requests and test them live, so you can easily test your search requests.

Authenticating REST API
To make requests to Search REST API you need to authenticate, this is nicely following the de-facto standard with Bearer tokens, and a when you get a Bearer token there is also a refresh token.
|
|
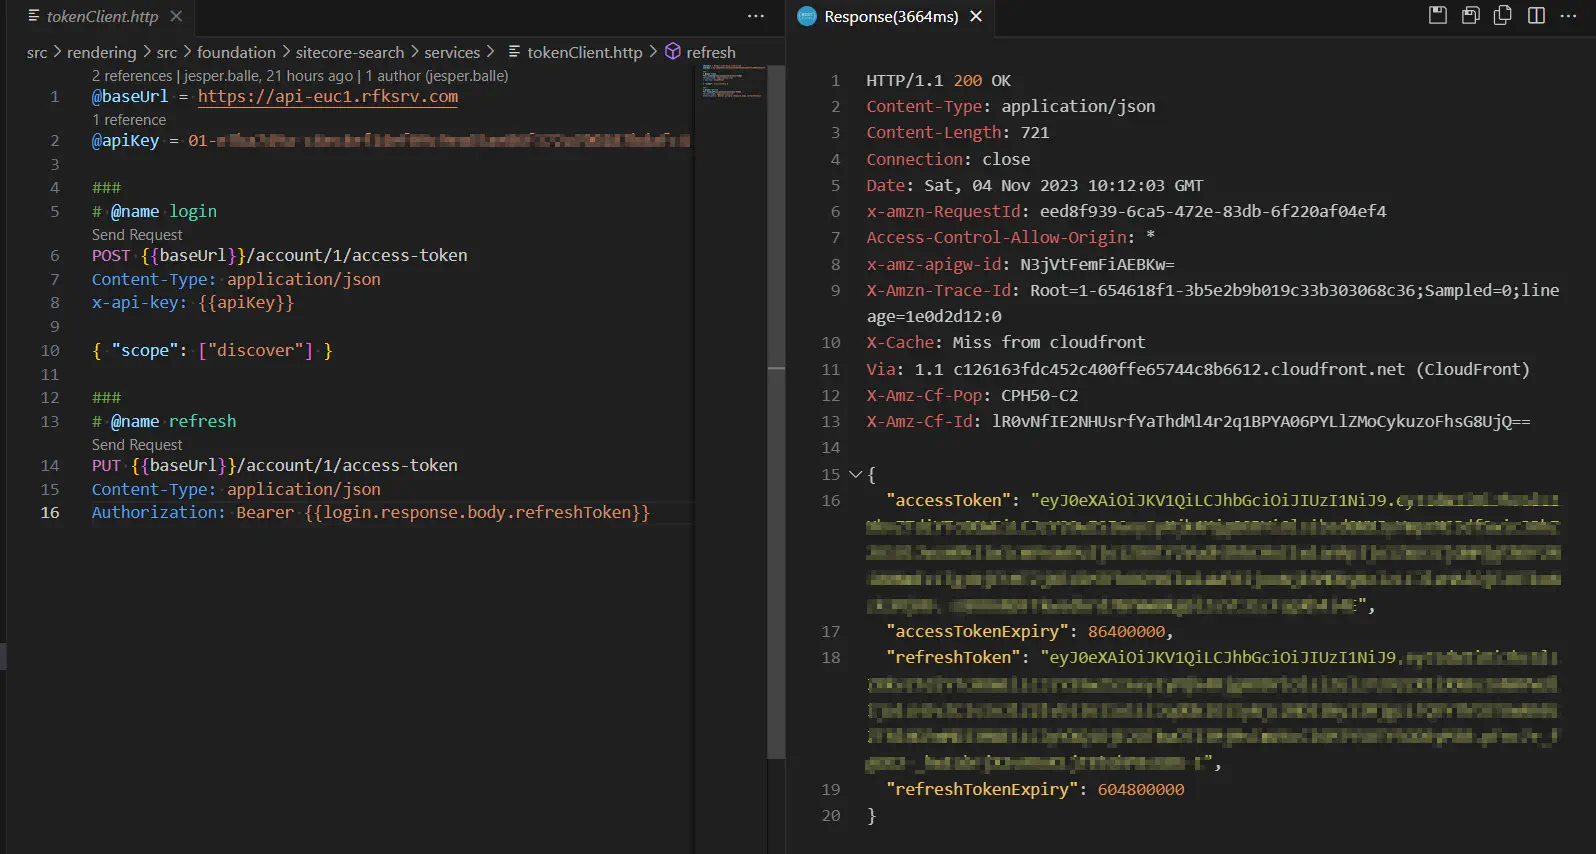
When testing a new API I always start fiddling with the endpoints, once I used Postman, now I always use the RestClient for VS Code where you can easily create a .http file and have your tests in repository.

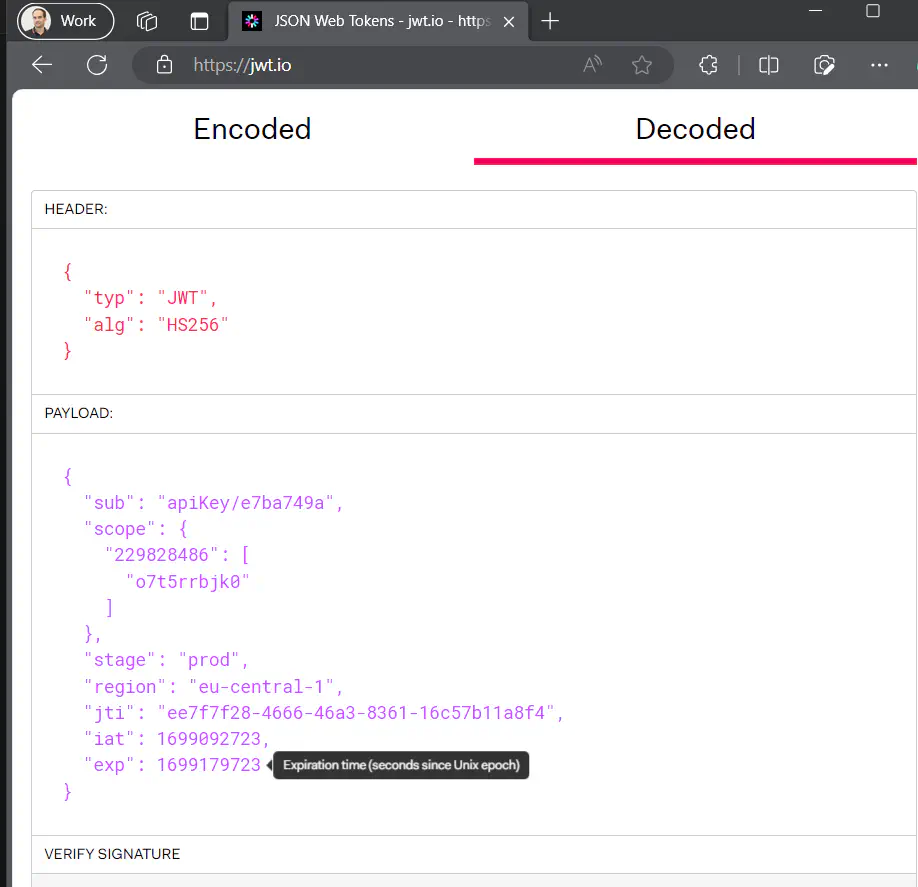
The result is a standard Json Web Token (JWT) and we notice the expiry is included in the result. It is following the same notation as the token itself where the exp attribute is “number of seconds since Unix epoc” and here the expiry result attribute specifies the number of seconds the token is valid for.
We can easily see the decoded content of the token with jwt.io

As we get the expiry easily available in the result there is actually no need to read the actual content of the JWT we can just save when the token was fetched and compare the number of seconds.
|
|
The expiry is actually valid for one year, so in reality you can probably keep the bearer token. There is a high chance that your application is restarted or rebuilt within a year, (especially when using Vercel to build upon publish), but as always it might change in the future how long the tokens actually are valid for.
Making requests
With a valid authentication token, next step is to request some real content from Sitecore Search.

The API explorer only supports adding search phrases. The url of the current page is necessary for the context for the context aware intelligence in Sitecore Search and to determine language etc.
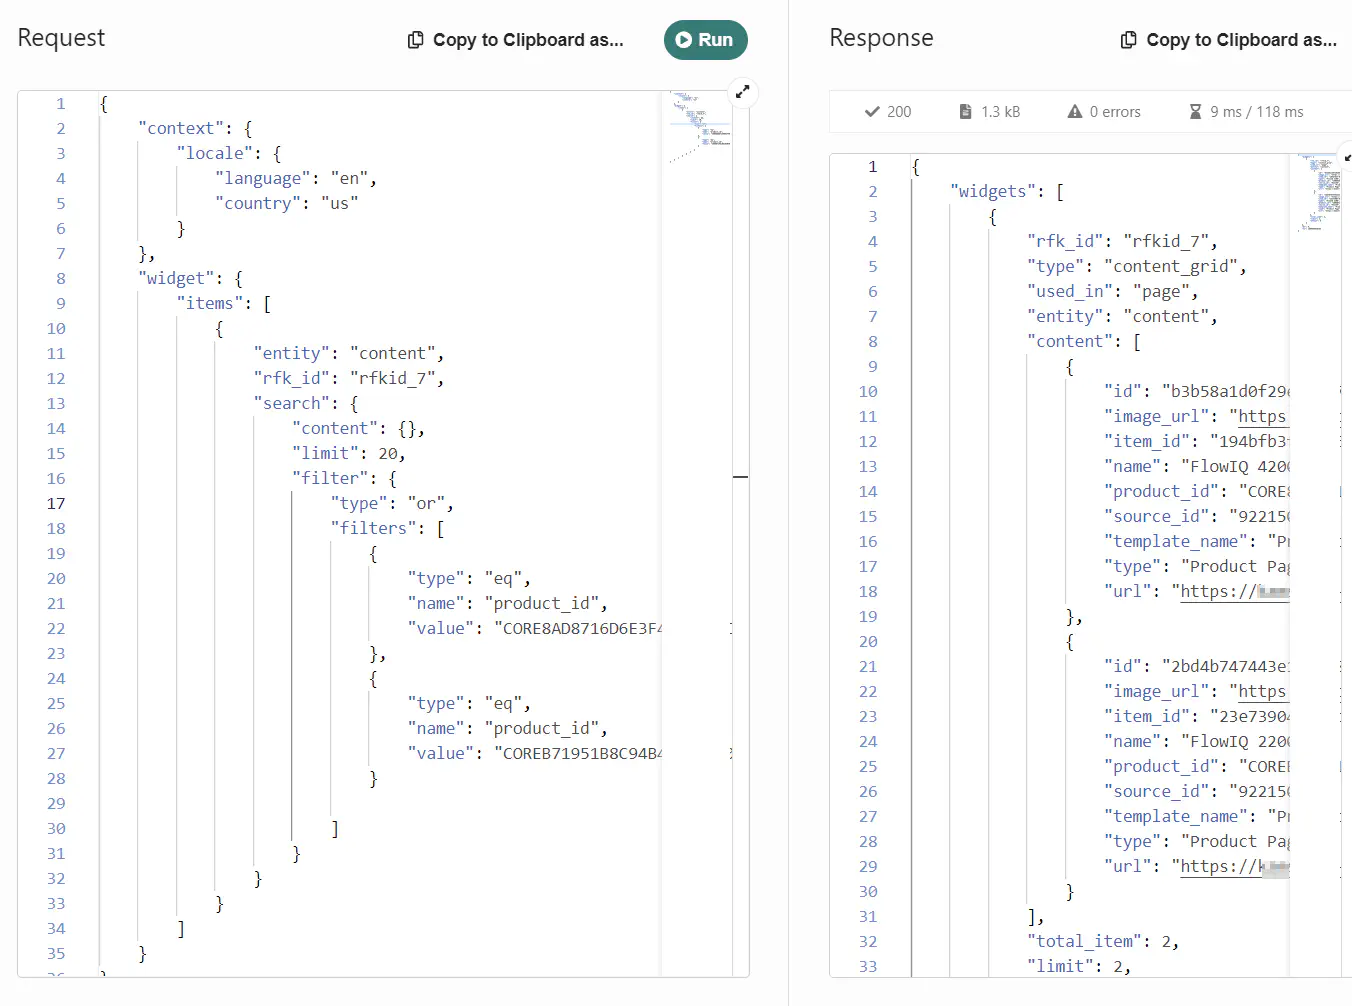
Based on the documentation we can also specify locale as context instead and filters can be specified.

The widget reference is still important, as this is the link to the Sitecore Search widget where rules can be configured. It actually makes sense to create specific widgets for various usage so you can have distinct analytics and can fine-tune the rules and results in Sitecore Search.
Hereby we can make the actual request for Sitecore Search
|
|
Create NextJS component to show Sitecore Search
Now we have the data from Sitecore Search, we can create a Sitecore component to render those data.
With the Sitecore GetStaticComponentProps method we can handle data fetching even in a component and still support Static Server Generation
|
|
Those server side fetched data are available in the actual component with the useComponentProps method and hereby it is just a matter of handling the rendering
|
|
We can have even more control in Sitecore Search
Now this was actually a very traditional approach where an editor chooses which items to show, and an editor is required to update the content. You can actually move this responsibility to Sitecore Search, eg. specify a certain widget and have rules configured for the widget instead. It might depend on your actual organization.